Accessing the Product Upload & Edit form
- Login to Dashboard / be already logged in
- Navigate to the Products section
- Click on one of the following:
a. Product name in the table
b. ‘Add Product’ button
c. Edit product action
d. Duplicate product action
Submitting for Approval
- When you are a) happy with the new product details, b) all information has been added to the required fields, and c) there are no errors present, you can submit the new product for approval.
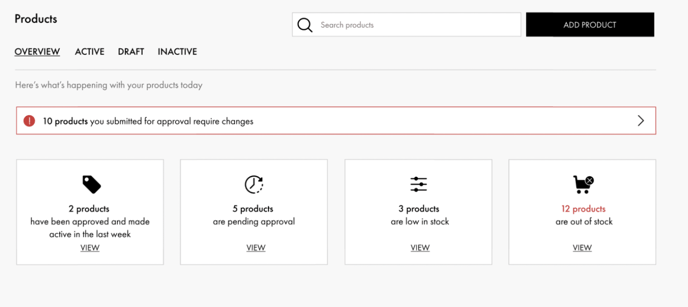
- Once submitted for approval, the product will have a ‘Pending approval’ status label enabled. This will be visible in the product section table.
- Pending approval products sit within the Draft status tab. A product cannot be edited whilst this label is present.
- If the product is rejected during the approval process, the product will be labelled with ‘Changes needed’ status label. This can be seen in the product section table.
- Rejected products sit within the Draft status tab.
- If a product is rejected and a member of staff adds a note, this will appear at the top of the form in a yellow box: Rejected products will also be highlighted in the Overview tab. Please see the example below.
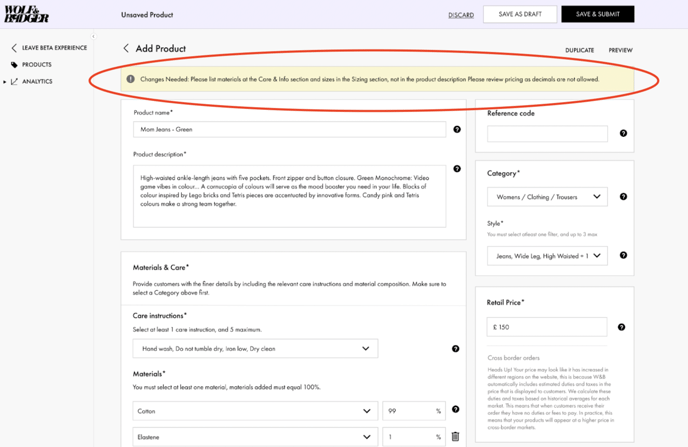
- Rejected products will also be highlighted in the Overview tab. Please see the example below:
Saving as a Draft
- You can save a new Product as a Draft, until they are ready to submit it for approval.
a) This can be found at the top of the form or the bottom of the form.
b)
c)
- If a new Shopify product has been imported, the product will have a ‘Missing information’ status label enabled. This can be seen in the Draft tab in the product section table.
a) This is because newly imported Shopify products are incomplete, because W&B requires additional information that Shopify does not collect.
b) This ‘Missing information’ label will only appear in the ‘Draft’ status tab. - To note, existing products cannot be saved as a Draft. However, Brands can of course edit existing products and ‘Save & Submit’. Edits will automatically be approved.
Duplicating a Product
When clicking the ‘Duplicate Product’ at the top of the form, a new product form will appear. To note, the Product Name field will be empty. You are required to input a new name.
Category & Style
- 1 primary category can be added.
- The primary category selected will impact the options presented in the following dropdowns & fields:
- Styles
- Variant category dropdown within the Variant modal
- The primary category selected will impact the options presented in the following dropdowns & fields:
- 1 style can be selected using the dropdown.
Retail Price
- The product price can only be added in whole numbers.
- You can only add the price in their base currency (what they pay their monthly subscription in)
- The field is greyed out and un-editable if attempting to edit a Shopify price (linked product with price sync enabled).
- Field is greyed out and un-editable if attempting to edit the price of a product that is stocked in store(s).
Materials
- You must add a Primary Category before clicking selecting a Material.
- If you do not, an error message will appear. - You must select at least 1 material - products cannot be saved / submitted without adding this information.
Colour
- 1 colour must be added. Only one colour can be added per product.
- However, multiple colours can be selected, by checking the colours in the same dropdown, if the product is multicoloured. For example, the dress is black and white, then the you should select Black and White.
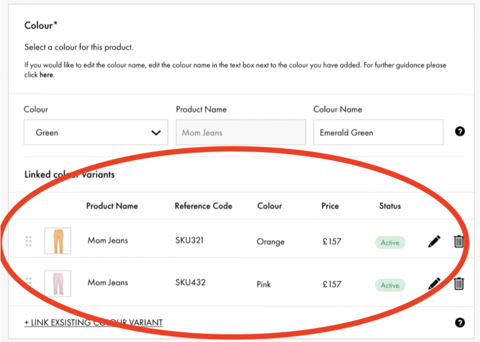
- This would ensure the swatch circle on the PDP is half white + half black. - If the product comes in different colour variants, another product will need to be created with the relevant Colour selected.
- You can do this easily by duplicating the product and changing the colour.
- This will ensure the Product's Colour Variant(s) show on the same product page on the website so customers can easily toggle between them.
Variants (Sizes)
- At least 1 size must be added - the product cannot be saved / submitted without adding at least 1 size.
- You must add a Primary Category before clicking the + Variant
- If you have not, an error message will appear. - A modal will appear when clicking on the + Variant
- The colour field will be uneditable / greyed out.
- Depending on the Primary category selected, the Size Category dropdown options will vary.
- Depending on the Size Category selected, the Size dropdown options will vary
- The same size/variant category should be used for all variants.
- You can delete product variants, both new & existing. This can be done by clicking on the ‘Bin’ icon.
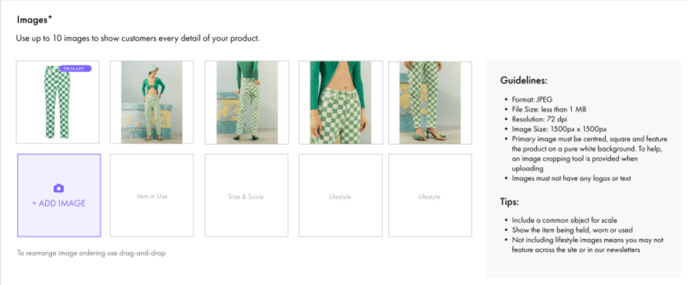
Images
- At least one primary/hero image must be added - you cannot save & submit the product without it.
- By clicking on the purple ‘Add Image’ tile, the existing cropping tool appears.
- The Purple ‘Add Image’ tile will always appear after the last uploaded image.
- You can rearrange images by dragging & dropping the image tiles.
- You should take extra care to follow guidelines shown.
NEW FEATURES
Shopify Logo
If the product is a Shopify imported product, a small Shopify logo will appear in the product table next to the product thumbnail image.
Status Labels
Status labels within the Products section tables:

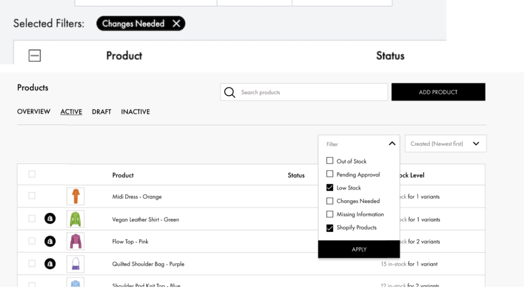
Filtering
-
- To filter products within each tab, navigate to the dropdown on the top right-hand side of the products table and choose which filter to enable.
- Once the filter is enabled, only products will show that have the specified filter/label enabled. The selected filter will also be visible at the top of the table and can be removed by clicking the cross symbol.
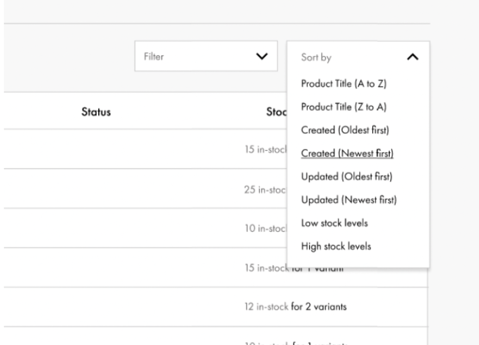
Sorting
Brands can sort products are displayed in the table, by default the table is sorted by ‘Created (Newest First)’
You can sort by the following:
NEW ACTIONS
Deleting Products
You can delete a product by selecting a product (using the tickbox) and selecting ‘Delete Product’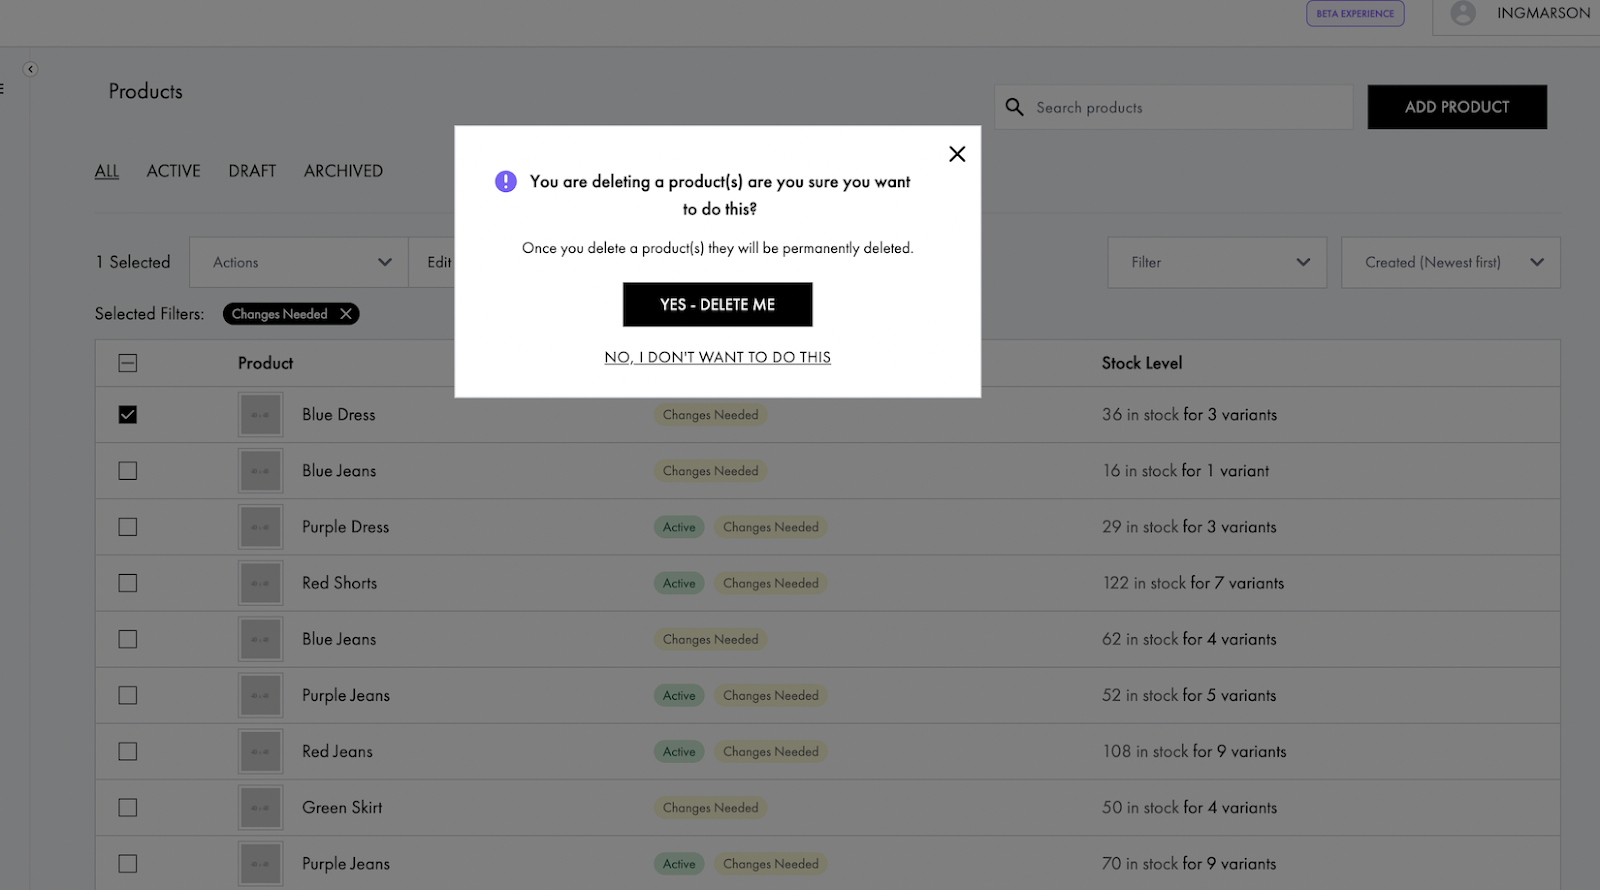
Making Product(s) Inactive
You have the ability to archive 1 or more products.- You can bulk archive products, using the checkbox to select relevant products or by clicking Select All'.
- You must select the Product they wish to archive using the checkbox.
- ‘Select All’ will select all products on that page.
- The ‘More actions’ dropdown menu appears when 1 product is selected and contains a Archive product(s)
- The ‘Actions’ dropdown menu appears when 2+ products are selected and contains a Archive product(s)
- You must select Archive product(s) in the dropdown
- Then, click ‘Apply’
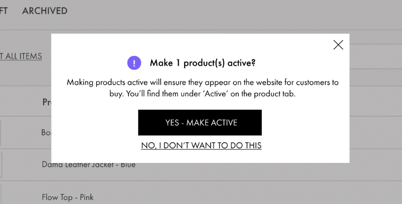
- You must click ‘YES - MAKE INACTIVE’ for the products to be made inactive.
- Modal appears when clicking on the dropdown ‘Apply' Inactive Products will move to the Inactive Tab.

Making Product(s) Active
You have the ability to make 1 or more products active, from the Inactive Tab.- You can bulk activate products, using the checkbox to select relevant products or by clicking Select All'.
- You will need to select the Product you wish to activate using the checkbox.
-
- The ‘More actions’ dropdown menu appears when 1 product is selected and contains a Make Active
- The ‘Actions’ dropdown menu appears when 2+ products are selected and contains a Make Active
- You must select Make Active in the dropdown
- Then, click ‘Apply’