
To integrate with Wolf & Badger, use the Shopify setup page:
- The shop name comes from your shop admin page URL. If your admin page is at https://myshopname.myshopify.com, your shop name is myshopname. For additional help, refer to this article.
- The API key comes from the API credentials page (see below).
- The Token is the Admin API access token (see below).
- Please ensure you save your API Key and token.
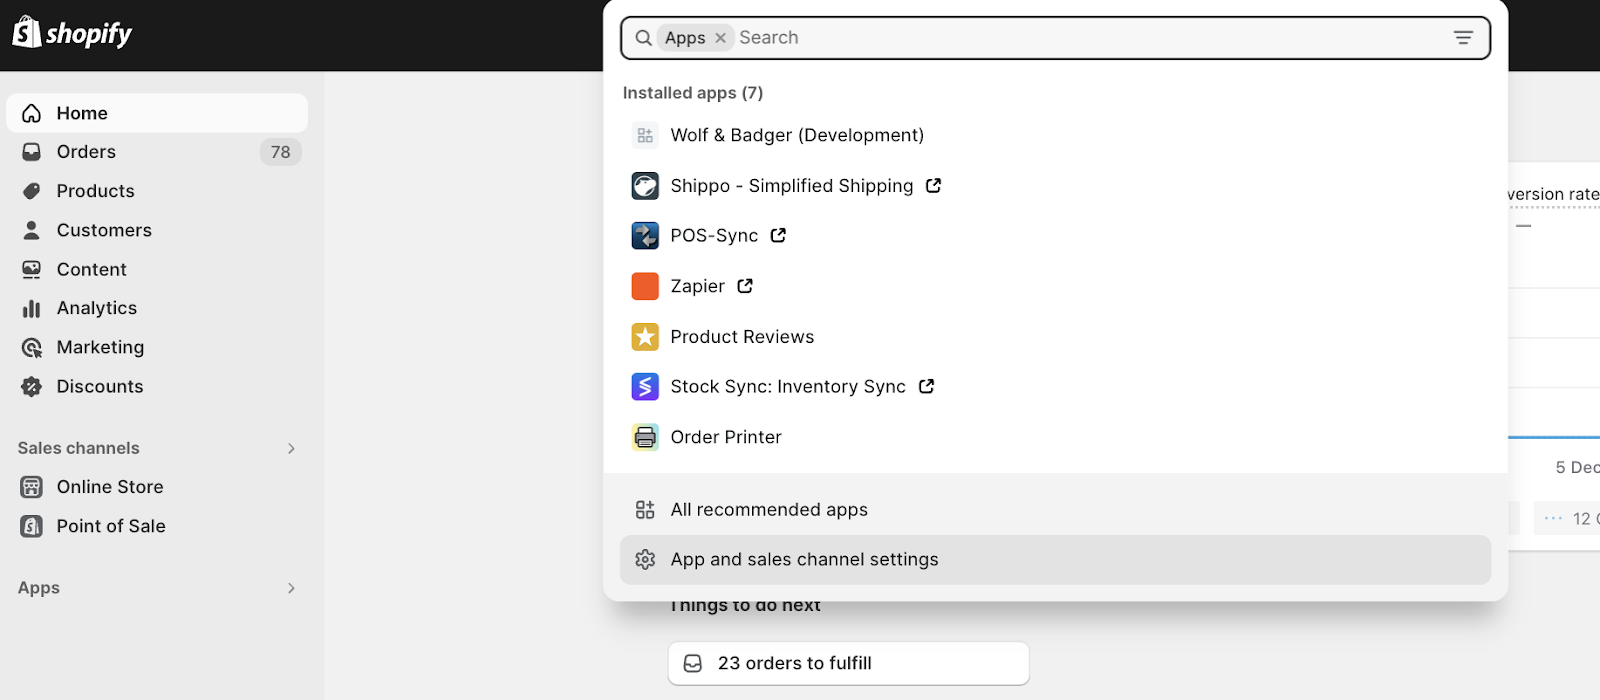
Go to your Shopify store and click “Apps” in the menu on the left.
When the “Apps” menu appears, click on ‘App and sales channel settings'
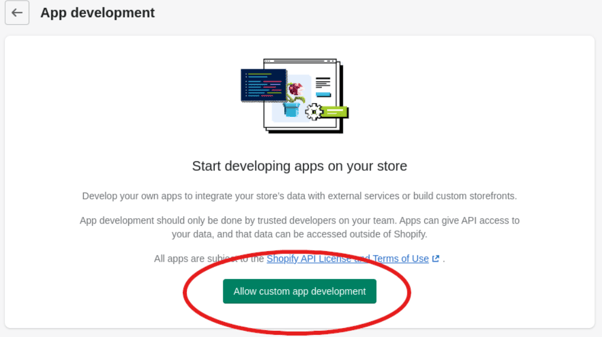
You will be asked to confirm that you want to allow custom app development. Click “Allow custom app development”.
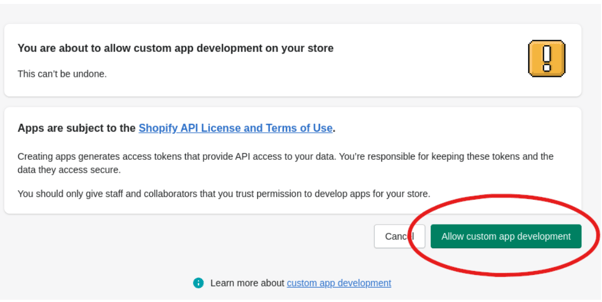
A new page will load. You will be asked to make doubly sure that you are ready to allow custom app development. Click “Allow custom app development” again.
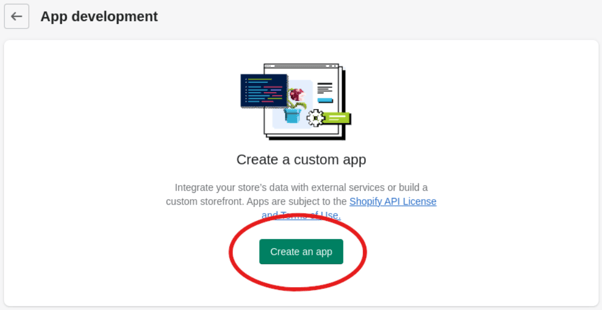
You will be presented with the option to create a custom app. Click “Create an app”.
Name the app “WBIntegration” and click OK to view the app admin page.
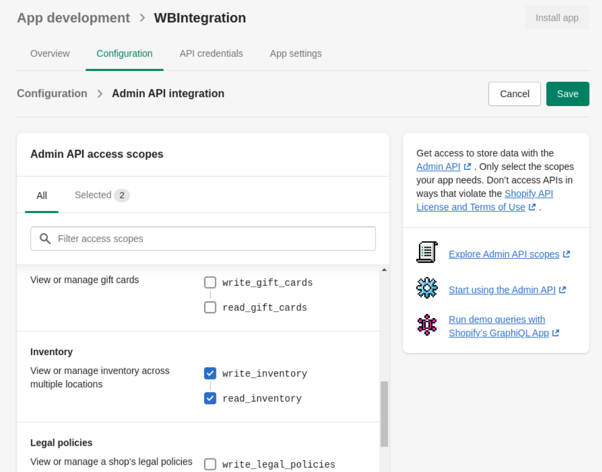
On the app admin page, select the “Configuration” tab, and then ‘Admin API integration’.
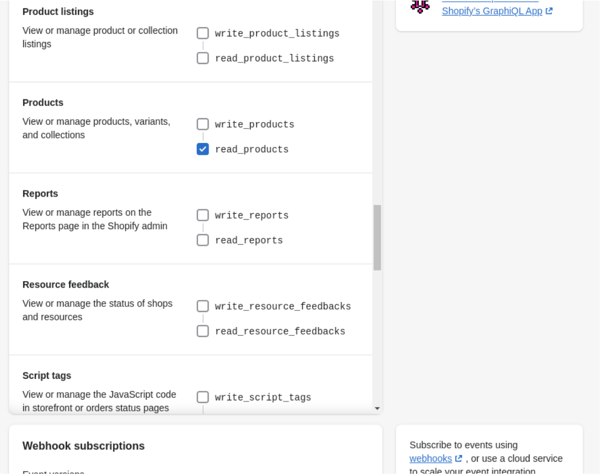
Scroll through the section labelled “API access scopes” and ensure that only “write_inventory”, “read_inventory”, and “read_products” are checked.
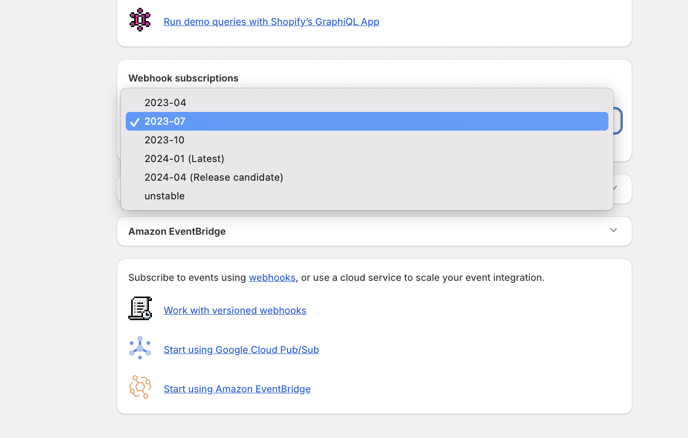
Scroll to the bottom of the page, and select “2023-07” for the “Webhook subscriptions” section. Then click “Save”.
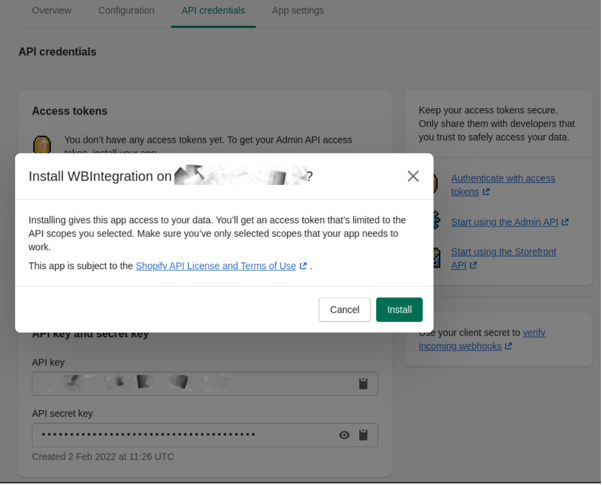
Click the “API Credentials” tab.
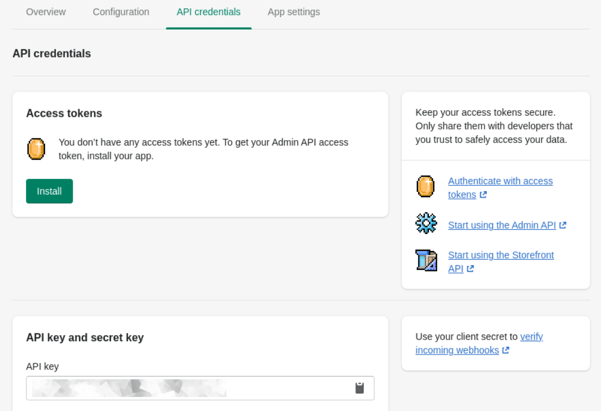
Click “Install” in the “Access tokens” section.
You will be prompted to confirm the installation. Click “Install” again.
To integrate with Wolf & Badger you will need the Admin API access token, the API secret key, and your shop name.
Click “Reveal token once”. Note that this does what it says and you will not get another chance to see this token, so copy and paste it somewhere secure.

